
Table of Contents
let's talk potlucks. Or maybe just needing a dessert that doesn't require turning on the oven when it's already too hot. You know the feeling – someone asks you to bring something, and your mind immediately goes blank or straight to store-bought cookies. There has to be an easier way to look like you actually tried, right?
What is Jello Cream Cheese Dessert and Why It's a Potluck Favorite
What is Jello Cream Cheese Dessert and Why It's a Potluck Favorite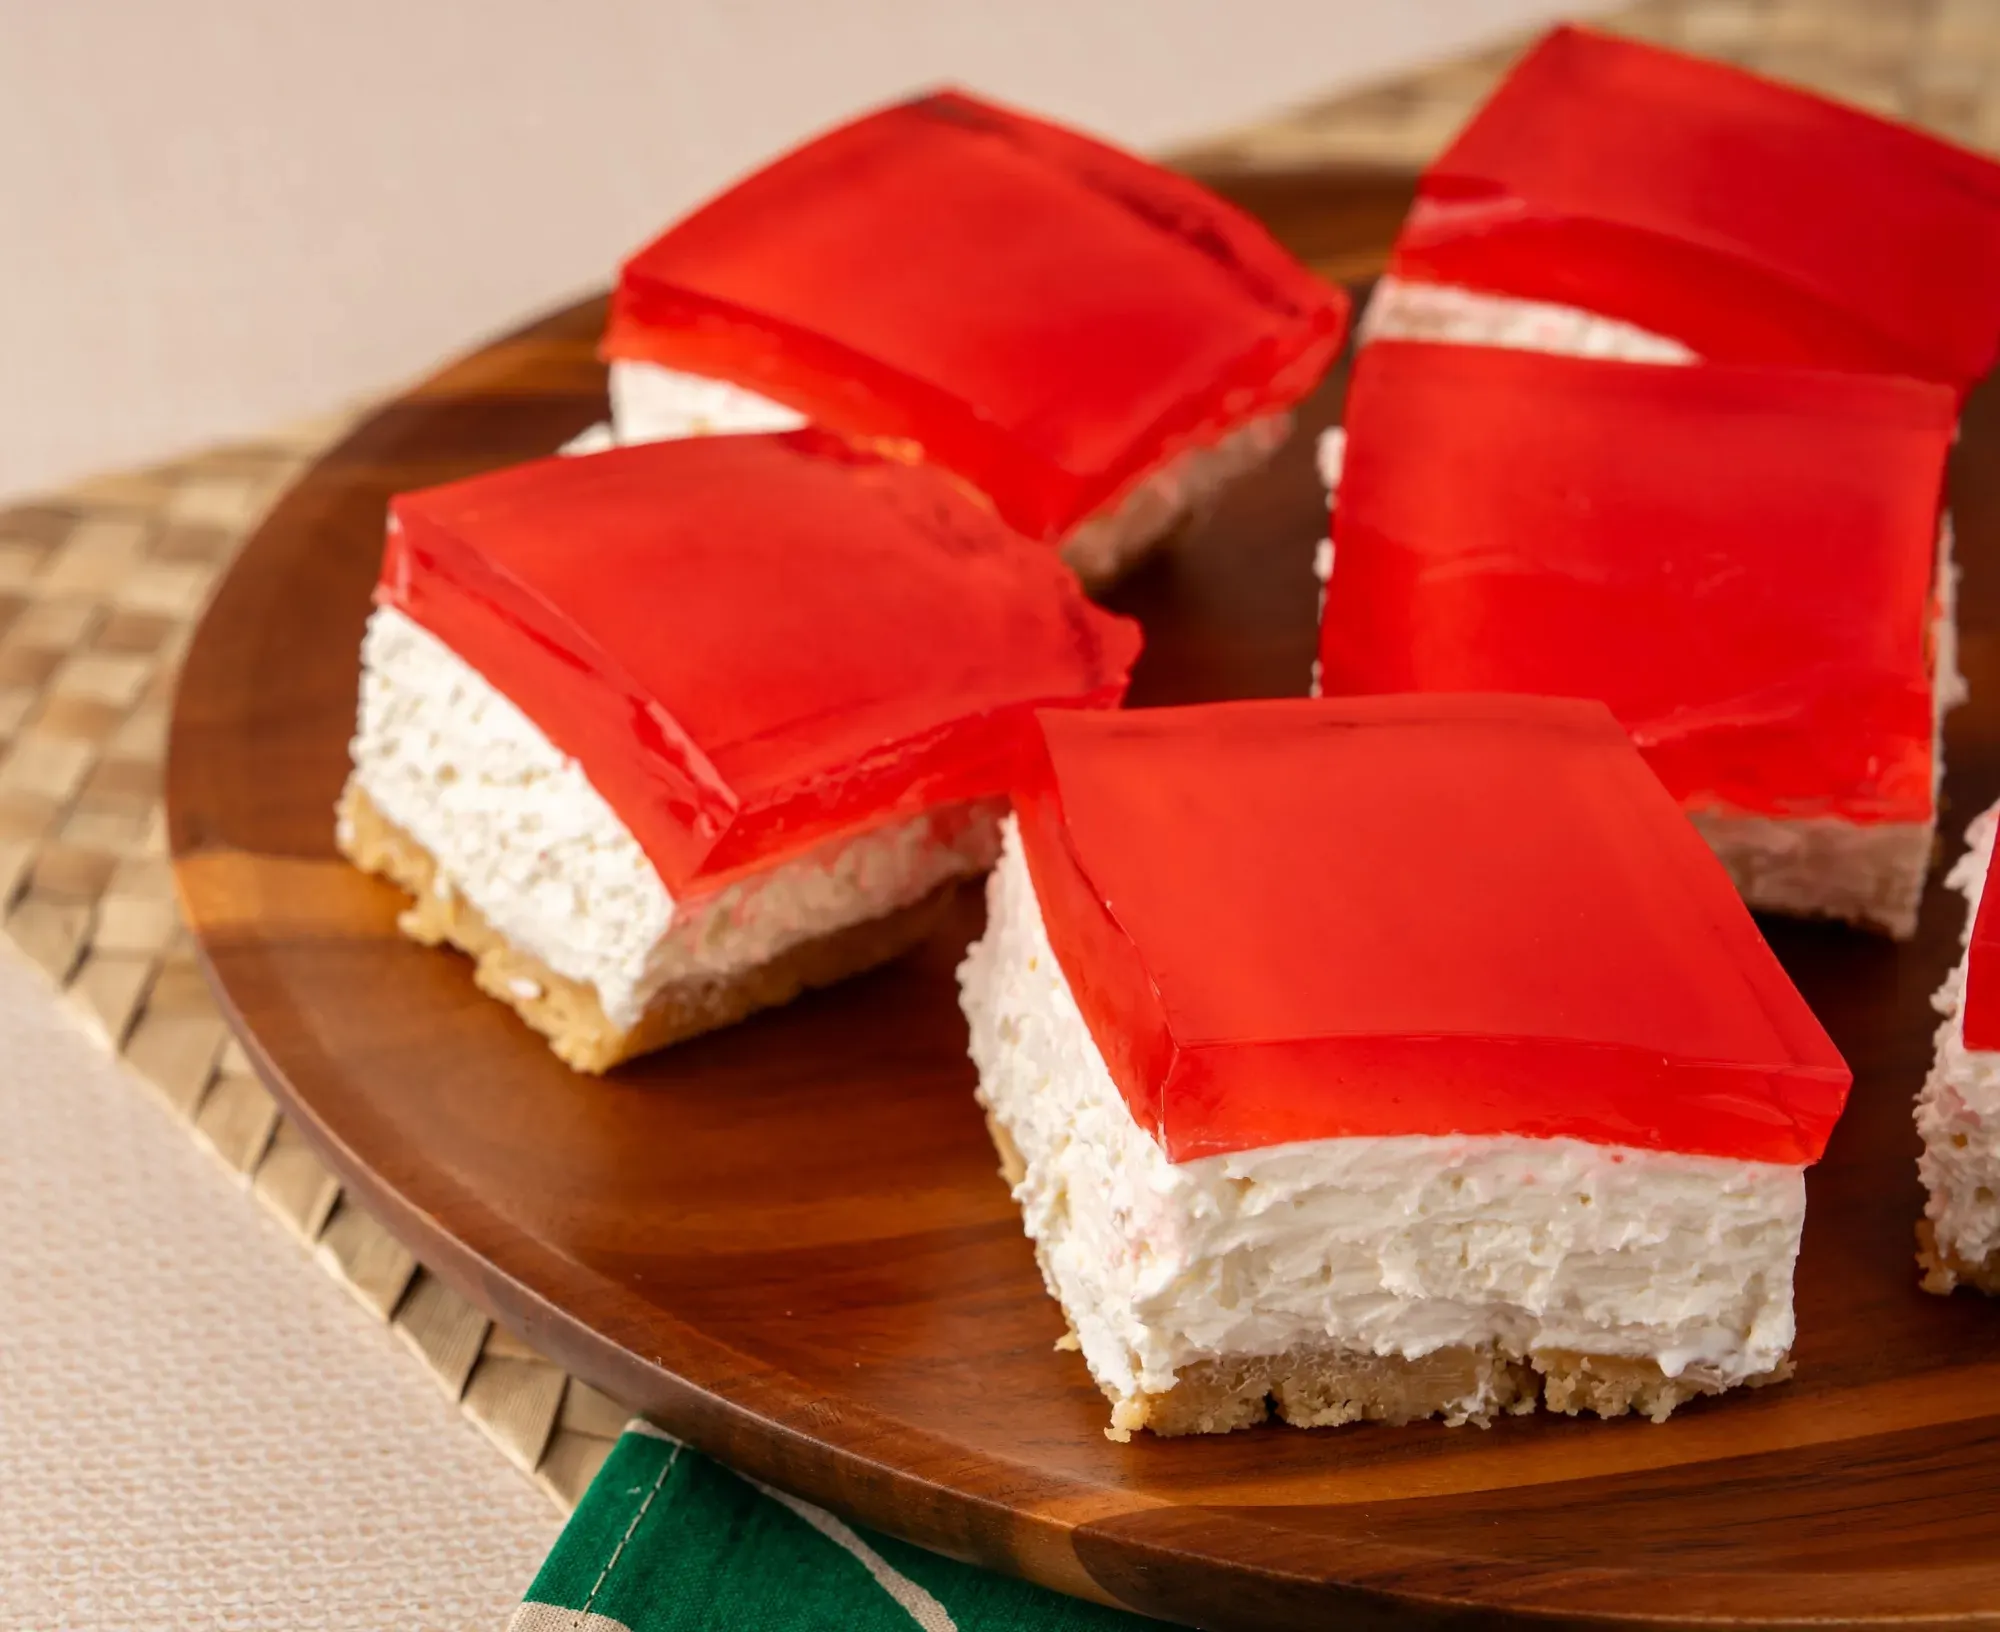
Breaking Down the Layers of Jello Cream Cheese Dessert
So, what exactly are we talking about when we say jello cream cheese dessert? Picture this: usually, it starts with a simple base, maybe crushed cookies or graham crackers pressed into a pan. Then comes a layer, or sometimes layers, of something creamy and rich, often involving cream cheese mixed with things like whipped topping, sour cream, or powdered sugar. Think cheesecake vibes but way less fussy.
The final touch, and the part that gives it its name, is the jello layer. This is typically a fruity jello, often strawberry or cherry, prepared and poured over the creamy base once it's set a bit. The layers chill and firm up, creating a dessert that's part solid, part jiggly, and entirely ready for slicing into squares. It's not gourmet; it's just good, simple comfort food.
Why This Simple Treat Steals the Show at Gatherings
Now, why does this humble jello cream cheese dessert keep showing up at every family reunion and neighborhood cookout? It's not because it's trendy or requires obscure ingredients. It's popular because it works. This dessert travels well; you just pop the lid on the pan and go. No delicate frosting to worry about, no intricate plating needed.
It also feeds a crowd without much effort. A 9x13 pan yields a decent number of squares, and frankly, people eat them. The combination of the slightly salty crust, the tangy-sweet cream cheese, and the fruity jello hits a nostalgic sweet spot for many. It's familiar, it's easy to serve, and it doesn't require a fork and knife unless you're feeling fancy. It's the definition of low-stress, high-reward dessert duty.
- Easy to make (seriously, no baking required for most versions).
- Travels well without falling apart.
- Feeds a good number of people from one pan.
- Appeals to almost everyone – kids and adults alike.
- Relatively inexpensive ingredients.
Crafting the Perfect Shortbread Crust for Your Jello Cream Cheese Dessert
Crafting the Perfect Shortbread Crust for Your Jello Cream Cheese Dessert
Why the Base Layer Matters
Alright, so we've established that jello cream cheese dessert is a crowd-pleaser. But like any good structure, it needs a solid foundation. For this particular version, we're going with a classic shortbread crust. Why shortbread? Because it's buttery, slightly crumbly, and holds up beautifully against the creamy and jiggly layers without getting soggy right away. It adds that essential textural contrast.
You don't need fancy ingredients here. Just some good quality shortbread cookies – the plain ones work best, no need for chocolate chips or anything extra. You'll also need some melted butter. That's pretty much it for the base. Simple, right? It's the kind of ingredient list that makes you think, " I can actually do this tonight."
Grinding and Mixing Your Way to Crust Perfection
Making the crust is straightforward. The first step is turning those cookies into crumbs. You can toss them in a food processor if you have one; a few pulses and you're done. If not, grab a zip-top bag, throw the cookies in, and get out some frustration by crushing them with a rolling pin or even the bottom of a sturdy glass. Aim for fine, even crumbs – no big chunks allowed, or your jello cream cheese dessert will have lumpy spots in the crust.
Once you have your crumbs, dump them into a bowl. Melt your butter – don't burn it, just melt it until it's liquid. Pour the melted butter over the crumbs and stir it all together. The goal is to get every single crumb coated in butter. It should look like wet sand. This butter is the glue that holds the crust together when it chills.
Here's a quick checklist for your shortbread crust:
- Use plain shortbread cookies.
- Process or crush cookies into fine crumbs.
- Melt butter completely.
- Mix butter thoroughly with crumbs until coated.
- Ensure there are no dry spots in the crumb mixture.
Pressing It Down and Chilling Out
Now for the fun part: pressing the crust into the pan. We're using a 9x13 inch pan because it's the standard potluck size. Pour the buttered crumbs into the pan. Use the bottom of a glass, a flat-bottomed measuring cup, or even your clean hands to firmly press the crumbs evenly across the bottom of the pan. Pay special attention to the edges and corners; you want a compact, even layer. This is crucial for a crust that doesn't fall apart when you slice the jello cream cheese dessert later.
After pressing, pop the pan into the refrigerator. Give it at least 30 minutes to chill. This lets the butter firm back up, binding the crumbs together into a solid crust. While it's chilling, you can start getting the ingredients ready for the next layer. See? Easy. You're already halfway to a fantastic jello cream cheese dessert.
Whipping Up the Creamy Jello Cream Cheese Layer
Whipping Up the Creamy Jello Cream Cheese Layer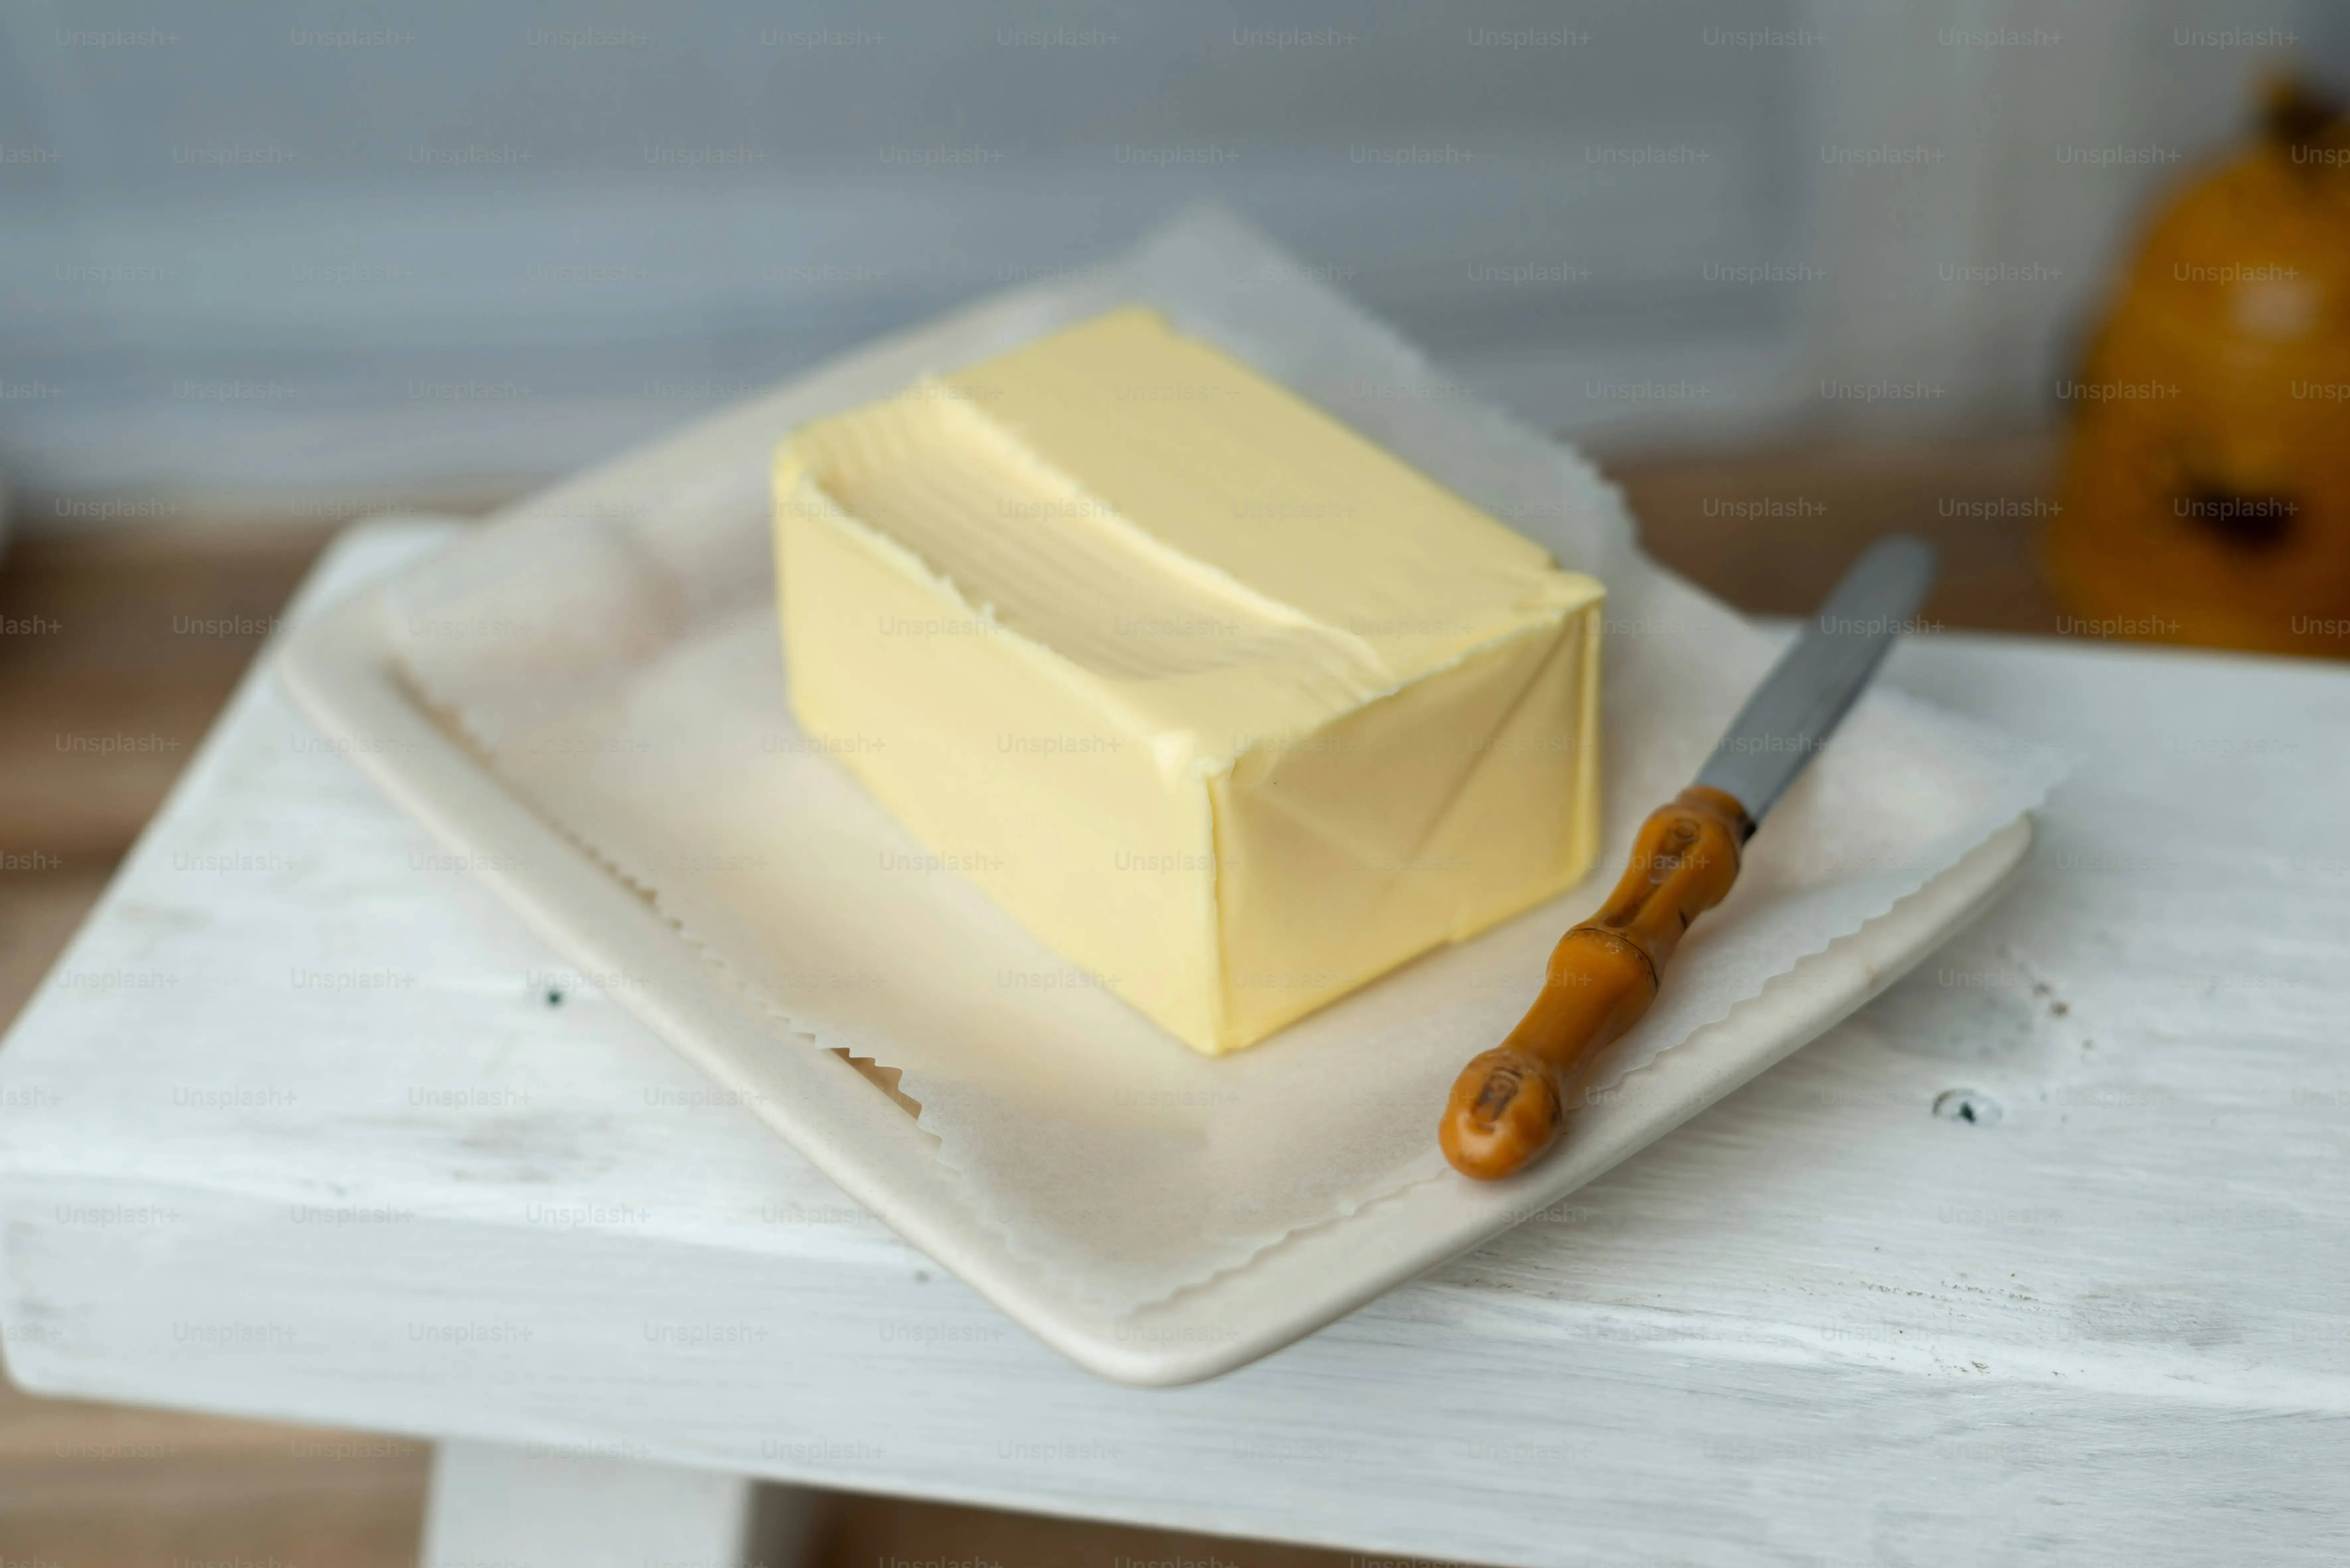
Gathering Your Creamy Layer Arsenal
crust is chilling. Time to tackle the heart of this jello cream cheese dessert: the creamy layer. This is where the magic happens, turning simple ingredients into something smooth, tangy, and utterly craveable. You'll need softened cream cheese – seriously, let it sit out for a bit, cold cream cheese is the enemy of smooth mixing. Grab some sour cream too; it adds a nice tang that cuts through the sweetness. Vanilla extract is a must for that classic dessert flavor, and a squeeze of lemon juice brightens everything up. Finally, powdered sugar to sweeten it just right.
Get a good-sized bowl. Toss in the softened cream cheese. Add the sour cream, vanilla, lemon juice, and powdered sugar. Now, grab your electric mixer. Start on low speed to combine everything without flinging powdered sugar all over your kitchen. Once it's mostly mixed, crank up the speed to medium-high. Beat it until the mixture is completely smooth and creamy. You don't want any lumps of cream cheese hanging out. Scrape down the sides of the bowl a couple of times to make sure everything gets incorporated. This step is non-negotiable for a silky layer in your jello cream cheese dessert.
Folding in the Fluff and Prepping for Assembly
Once your cream cheese mixture is lump-free and smooth, it's time for the whipped topping. If you're using frozen whipped topping, make sure it's completely thawed but still cold. Gently fold the whipped topping into the cream cheese mixture. What does "fold" mean? It means don't beat it with the electric mixer. Use a spatula and gently scoop from the bottom of the bowl, lifting the heavier cream cheese mixture over the lighter whipped topping. Turn the bowl as you go. The goal is to combine them without deflating the whipped topping, keeping that airy texture.
Keep folding until there are no streaks of plain whipped topping or cream cheese mixture – it should be one uniform, light, and fluffy mixture. Don't overmix, or you'll lose the airiness. Taste a tiny bit if you dare – it should be sweet but with a nice tang from the cream cheese and sour cream. Once it looks good, pull that chilled crust out of the fridge. Carefully spoon the cream cheese mixture over the crust, spreading it evenly to the edges. This layer is now ready to chill itself while you get the jello sorted for your glorious jello cream cheese dessert.
Adding the Vibrant Jello Topping and Assembling Your Squares
Getting Your Jello Ready for Action
your cream cheese layer is spread out over the crust, looking all smooth and inviting. Now for the pop of color and flavor: the jello. Don't just grab any old box; for this jello cream cheese dessert, strawberry is classic, but feel free to branch out. Cherry works, raspberry is nice, even lime if you're feeling retro. Whatever flavor you pick, follow the package directions for the "gelatin" part, specifically the part where you dissolve it in boiling water. Use the amount of boiling water specified on the box.
Pour the boiling water into a bowl with the jello powder and stir it like you mean it. You need to make sure every single granule of that powder is dissolved. No gritty bits allowed. Stir until it's completely clear and vibrant. This step is crucial for a smooth, even jello layer on your jello cream cheese dessert.
The Critical Cooling Step for Layering
Here's where people sometimes mess up their jello cream cheese dessert layers. Once the jello powder is dissolved in the boiling water, you add the cold water. Again, use the amount specified on the box. Stir that in thoroughly. Now, this is the important part: you absolutely cannot pour hot or even warm jello over your creamy layer. It will melt the cream cheese mixture and you'll end up with a marbled mess, not distinct layers.
You need to let the jello cool and thicken slightly. Not to the point where it's fully set and jiggly, but it should be cool to the touch and have a syrupy, slightly thickened consistency. Think of it like when you're making gravy and it starts to coat the back of a spoon. This can take anywhere from 20 minutes to an hour at room temperature, maybe faster if you pop the bowl in the fridge (but watch it closely!). Patience here prevents disaster.
Signs your jello is ready to pour:
- It's cool to the touch, not warm.
- It coats the back of a spoon slightly.
- It's not yet jiggly or fully set.
- It pours in a thick stream, not like water.
Pouring, Setting, and the Final Reveal
Your jello is perfectly cooled and slightly thickened. Your cream cheese layer is waiting patiently in the pan. Now for the final assembly of your jello cream cheese dessert. Gently, and I mean gently, pour the cooled jello over the back of a spoon held just above the cream cheese layer. This helps distribute the jello evenly and prevents it from creating divots or breaking through the creamy layer. Pour it slowly and cover the entire surface.
Once the jello is poured, carefully transfer the pan back to the refrigerator. This is where the real magic happens – the setting. Your jello cream cheese dessert needs ample time to chill and firm up completely. At least 4 hours is the minimum, but overnight is even better if you have the time. This ensures clean cuts and layers that hold their shape. When it's fully set, you'll have a beautiful, layered jello cream cheese dessert ready to slice and serve.
Tips for Setting, Cutting, and Enjoying Your Jello Cream Cheese Dessert
Tips for Setting, Cutting, and Enjoying Your Jello Cream Cheese Dessert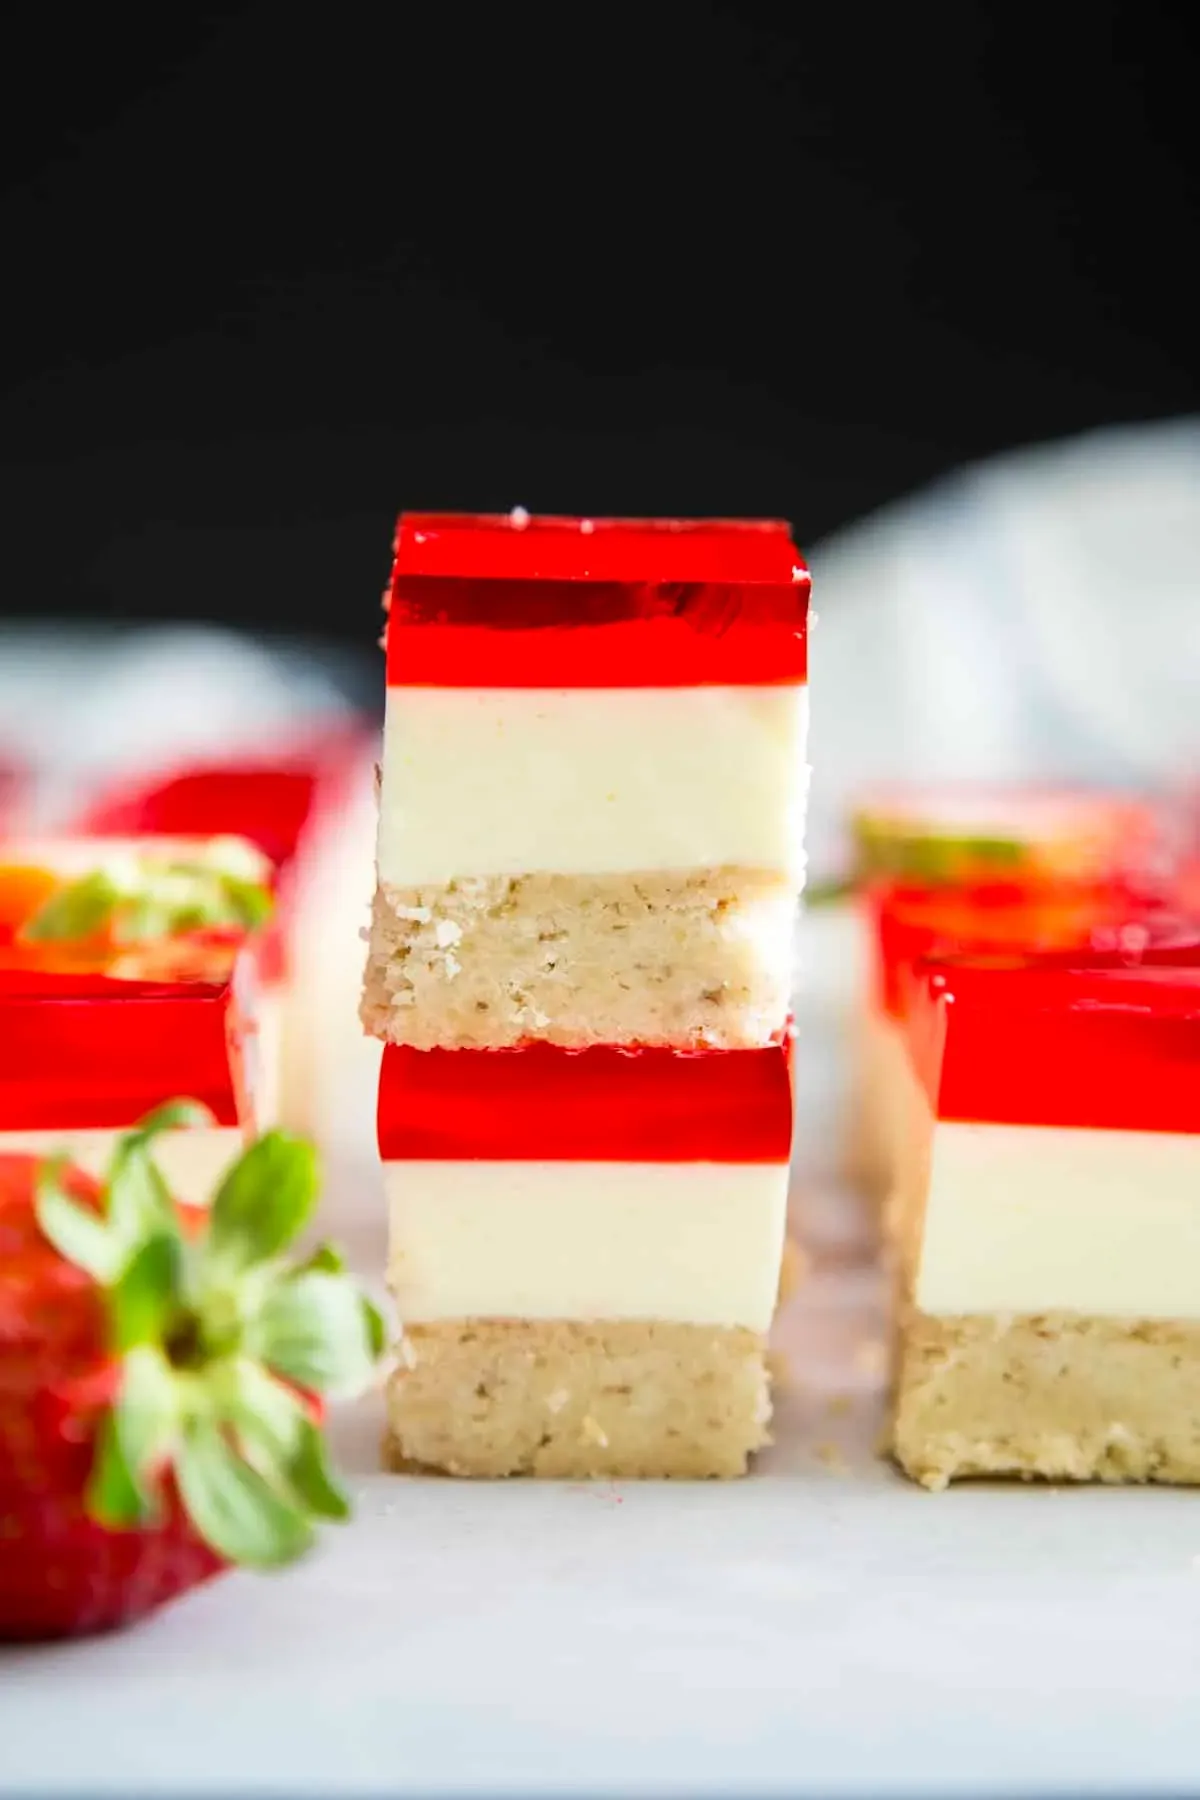
Giving Your Jello Cream Cheese Dessert Ample Time to Set
You've layered everything beautifully, the colors are vibrant, and you're itching to dig in. Hold up. The single most important step for a successful jello cream cheese dessert that doesn't turn into a sad, sloshy mess when you try to serve it is patience. This thing needs serious chill time. We're not talking an hour or two; we're talking a minimum of four hours, but honestly, overnight is the real deal.
Think of it like letting a good sauce simmer or a steak rest. The flavors meld, and more importantly, the gelatin and cream cheese layers firm up properly. If you cut into it too soon, the jello will likely be too soft, and the cream cheese layer might squish around. Pop it in the back of the fridge, out of sight, out of mind (if you can manage it), and let science do its thing. A properly set jello cream cheese dessert is the key to clean slices and happy eaters.
Mastering the Art of Cutting Clean Squares
it's set. It looks perfect in the pan. Now comes the moment of truth: cutting. Don't just grab any old knife and hack away. For clean cuts that show off those pretty layers of your jello cream cheese dessert, a sharp knife is your friend. Even better, use a knife that you've run under hot water and quickly dried between each cut. The warm blade glides through the layers instead of dragging and tearing them.
Decide how big you want your squares. For a standard 9x13 pan, cutting it into 4 rows by 3 rows gives you 12 decent-sized pieces, which is what this recipe yields. Make your first cut straight down, pull the knife out, rinse it in hot water, dry it, and make the next cut. Yeah, it takes a little extra time, but the result is worth it. You get neat, defined squares that look like you know what you're doing.
Here’s a quick knife trick for perfect slices:
- Use a sharp, thin-bladed knife.
- Run the knife under hot water.
- Wipe the blade dry immediately.
- Make a single cut straight down.
- Repeat the hot water/dry/cut process for each slice.
Serving Up and Savoring Your Creation
You've waited, you've chilled, you've cut. Now it's time for the payoff: serving your beautiful jello cream cheese dessert squares. Use a spatula to lift the squares out of the pan. Because of the sturdy crust and well-set layers, they should come out relatively easily. Arrange them on a platter, or serve them directly from the pan – no judgment here.
This dessert is best served cold, straight from the fridge. There's no need for extra toppings unless you really want to get wild with a dollop of whipped cream or a fresh berry garnish. The beauty of this jello cream cheese dessert is its simplicity and refreshing quality. Watch people's faces light up with nostalgia. It's a guaranteed hit, proof that sometimes, the easiest desserts are the most beloved. So go ahead, take a bite, and enjoy the sweet, creamy, jiggly goodness you created.
Your New Go-To No-Bake Dessert
So there you have it. No baking, minimal fuss, and a dessert that reliably disappears from the table faster than you can say "pass the fork." This jello cream cheese dessert is more than just a recipe; it's a ticket to easy entertaining and happy faces. Give it a shot the next time you need something sweet and simple. You might just find yourself making it again and again.