Table of Contents
If you're anything like me, you're always on the hunt for that perfect dessert—one that's both delicious and, let's be honest, doesn't leave you feeling like you've just eaten a brick. And if you're navigating the world of gluten-free baking, the quest can feel even more challenging. That's why I'm so excited to share my go-to recipe for gluten free lemon bars. These aren't just any lemon bars; they're a symphony of tangy lemon curd and buttery shortbread crust that happens to be completely gluten-free. We'll be exploring what makes this recipe special, from the specific gluten-free flour blend to the secrets of a smooth, creamy filling. I’ll walk you through each step, giving you the lowdown on ingredients, substitutions, and those all-important tips to avoid common pitfalls. Plus, we'll tackle some frequently asked questions, so you can bake with confidence. Get ready to discover a world of amazing gluten free lemon dessert recipes, starting with these incredible bars.
Why These Gluten Free Lemon Bars Are Special
Why These Gluten Free Lemon Bars Are Special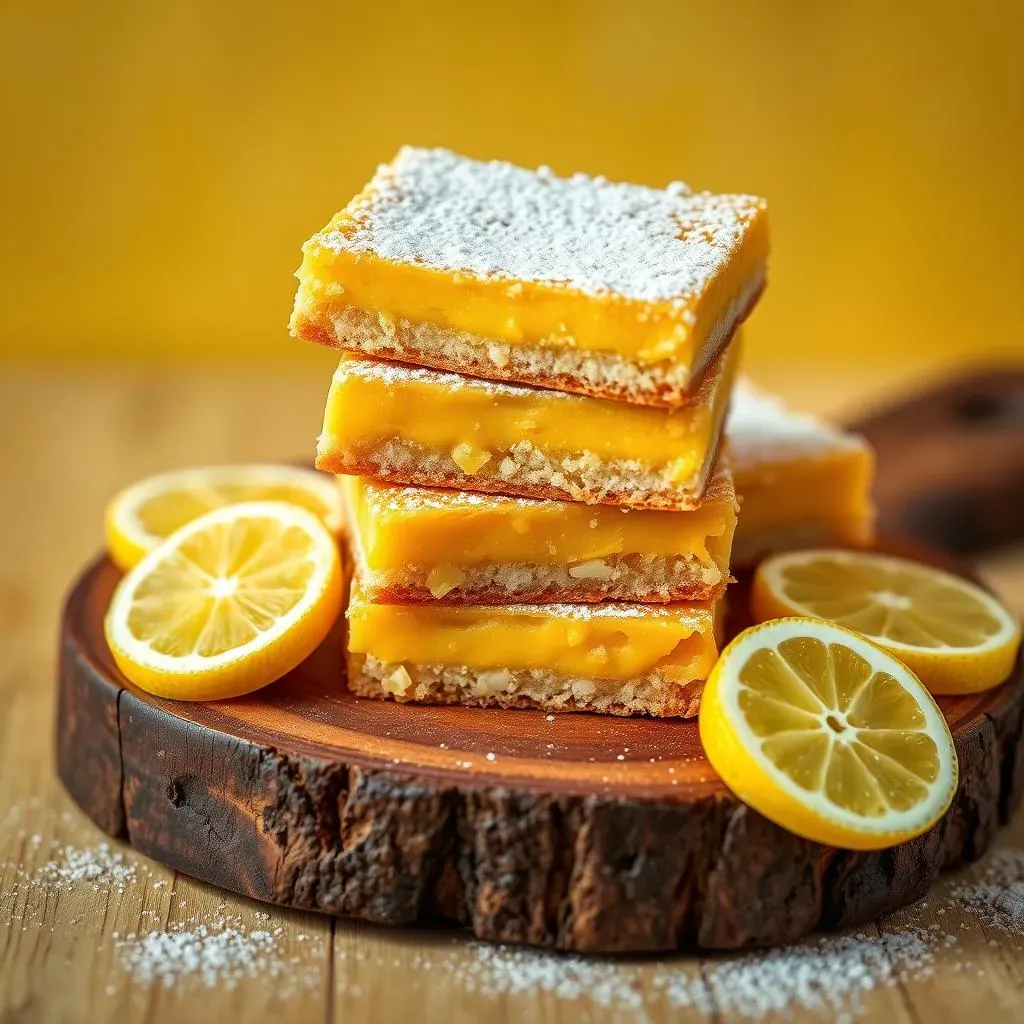
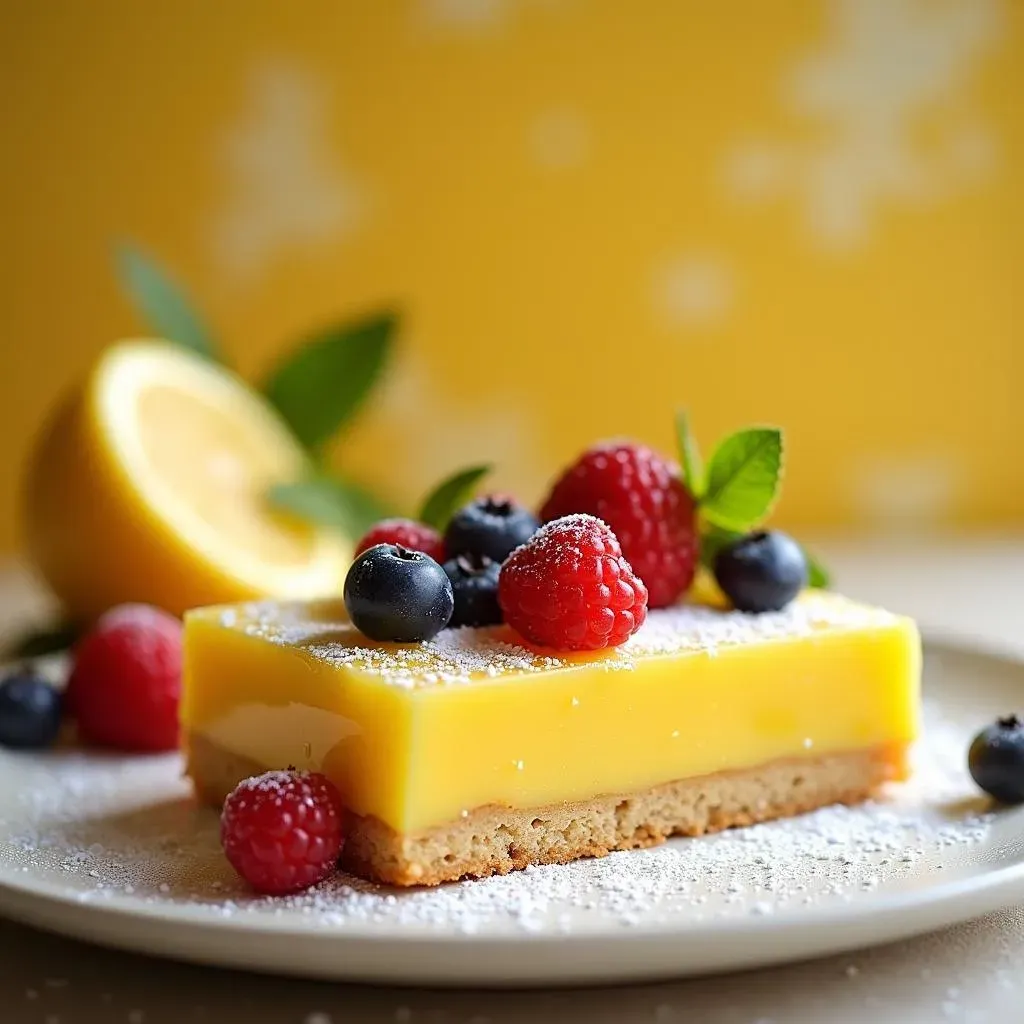
Okay, so you might be thinking, "Another lemon bar recipe? What's the big deal?" I get it. But trust me, these gluten-free lemon bars are in a league of their own. First off, we're not messing around with any of those gummy, weird-textured gluten-free flours you might have encountered before. This recipe uses a specific blend that results in a shortbread crust that's actually, dare I say, better than the original. It’s crisp, buttery, and holds its shape, which is a minor miracle in the gluten-free world. Then there's the filling, oh the filling! It's not just sweet, it’s a perfect balance of sweet and tart, with a creamy texture that just melts in your mouth. It’s like sunshine in a bar, without any of that artificial lemon flavor, because we’re using fresh lemon juice here – none of that bottled stuff. And the best part? They're surprisingly easy to make. You don't need to be a pastry chef to pull these off, just a love for good lemon desserts.
Making the Perfect Gluten Free Lemon Bars: Ingredients and Steps
Making the Perfect Gluten Free Lemon Bars: Ingredients and Steps
The Crust: Foundation of Flavor
Alright, let’s get down to brass tacks. For the crust, we're aiming for that perfect shortbread texture, which means no tough or crumbly mess. You'll need 170 grams of a good quality gluten-free flour blend. And when I say good quality, I mean one that already has xanthan gum or a similar binder in it. Trust me, this makes a huge difference. Don’t just scoop it out of the bag; use a kitchen scale for accuracy. Scooping and dragging can compress the flour, and you’ll end up with too much, which messes everything up. Next up, 50 grams of confectioners' sugar for that melt-in-your-mouth sweetness, 1 tablespoon of lemon zest for a little extra zing, and 113 grams of melted unsalted butter. The butter needs to be melted but not hot, we don't want to cook the flour. Mix it all together until it looks like wet sand, then press it into your baking pan. And here's the key: we're baking this crust separately before we add the filling. This ensures it's perfectly crisp and ready to hold that luscious lemon filling.
The Lemon Custard: Tangy Perfection
Now for the star of the show, the lemon filling. You'll need 3 large eggs, 200 grams of granulated sugar, and 1 teaspoon of baking powder. The baking powder might sound odd in lemon bars, but it helps give the filling a light texture, not dense. Then the most crucial part is the lemon juice; you'll need 120 ml of freshly squeezed lemon juice. I repeat, freshly squeezed! Bottled lemon juice is just not the same, it tends to be bitter and can ruin the whole experience. Whisk all of that together until it's smooth and kinda frothy, then carefully pour it over the pre-baked crust. Pop it back in the oven and bake until the filling is set but still has a slight jiggle. You'll know it's ready when the edges are golden and the center is no longer liquid. And here's a pro tip: let it cool completely before you even think about cutting into it. Patience is key, my friend, patience is key.
Ingredient | Quantity | Notes |
|---|---|---|
Gluten-Free Flour Blend | 170 grams | With xanthan gum or binder |
Confectioners' Sugar | 50 grams | For sweetness |
Lemon Zest | 1 tablespoon | For extra zing |
Unsalted Butter | 113 grams | Melted but not hot |
Large Eggs | 3 | For the filling |
Granulated Sugar | 200 grams | For sweetness |
Baking Powder | 1 teaspoon | For texture |
Fresh Lemon Juice | 120 ml | Freshly squeezed |
Tips and Tricks for the Best Gluten Free Lemon Dessert Recipes
Tips and Tricks for the Best Gluten Free Lemon Dessert Recipes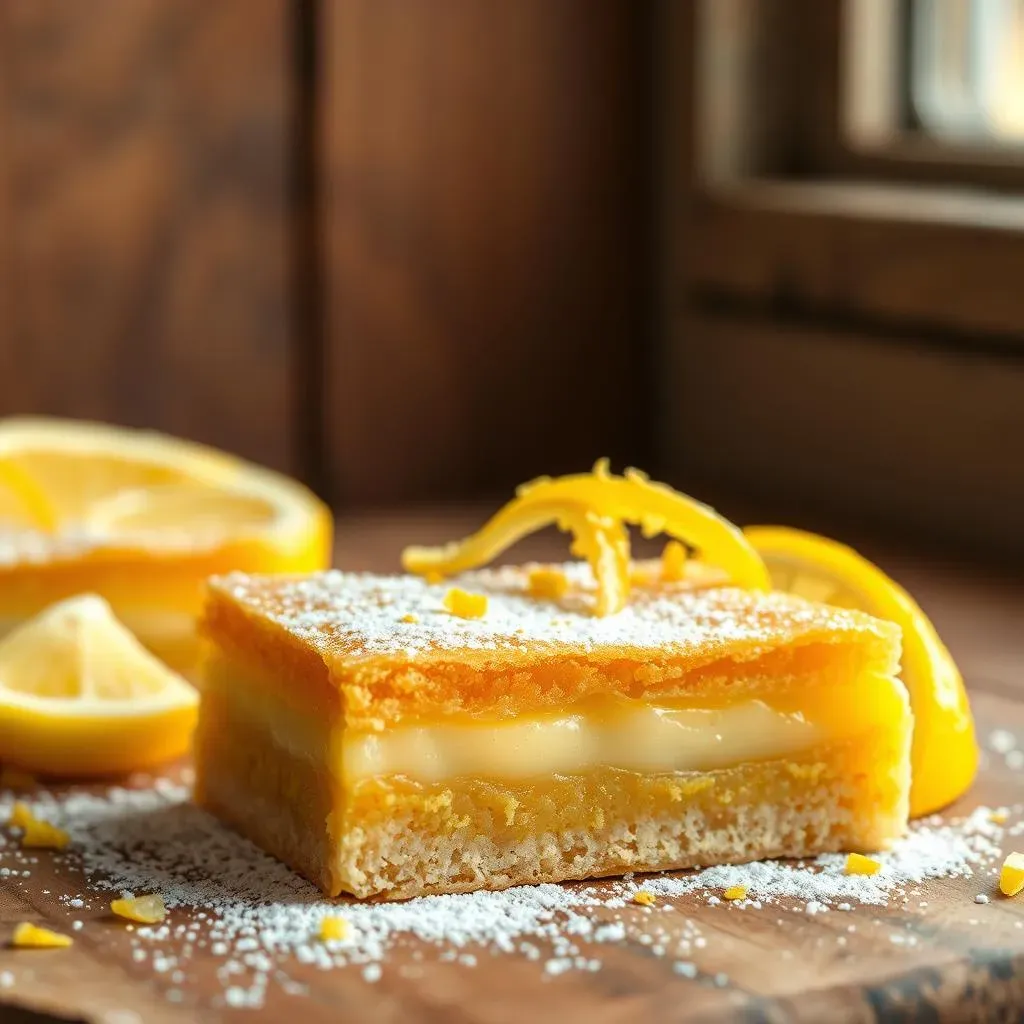
Mastering the Gluten-Free Bake
Okay, let's talk strategy. Gluten-free baking can be a bit of a wild card, but with a few smart moves, you can totally nail these lemon bars. First, don't even think about skipping the pre-bake for the crust. This step is crucial for getting that perfect crispness. If you skip it, you'll end up with a soggy mess, and nobody wants that. Also, when you're pressing the crust into the pan, make sure it's even. We're not looking for a crust that's thick on one side and thin on the other. Use the back of a spoon or even a measuring cup to get it nice and smooth. And another thing, do not overbake the filling. You want it to be set, but with a slight jiggle. If you bake it too long, it'll be dry and cracked, and it just won't have that creamy texture we're going for.
And here's a pro tip that I learned the hard way: let the bars cool completely, and I mean completely, before you even think about cutting them. I know it’s tempting to dive in when they come out of the oven, but trust me, you'll end up with a gooey mess. Let them cool at room temperature, then pop them in the fridge for at least two hours. This will make slicing them so much easier and give them that perfect set texture. I actually like to leave them in the fridge overnight, if I'm not in a rush. It makes them even better the next day.
Lemon Love: Getting the Best Flavor
Now, let’s get into the nitty-gritty of lemon flavor. We already talked about using fresh lemon juice, but let's dig a little deeper. When you're zesting the lemon, make sure you're only getting the yellow part of the peel and not the white pith, which can be bitter. A microplane zester is your best friend here; it makes the job super easy and gets you those fine little pieces of zest. And when you're juicing the lemons, roll them on the counter with your palm before you cut them. This helps release the juice and makes it easier to squeeze. Also, don't be afraid to taste the filling before you pour it over the crust. If you like things extra tart, add a little more lemon juice. If you prefer things sweeter, add a bit more sugar. It's your dessert; make it exactly how you like it.
And here's a fun twist: you can use different types of lemons for different flavor profiles. Meyer lemons are sweeter and less acidic, so they'll give you a milder flavor. Regular lemons are more tart and bright. Experiment and see what you like best! I once tried a mix of both, and it was pretty amazing. And if you're feeling adventurous, try adding a little bit of lemon extract to boost that lemon flavor even more. Just a teaspoon will do the trick. But remember, less is more with extracts; they can be quite strong.
Tip | Why It Matters |
|---|---|
Pre-bake the crust | Ensures a crisp base, not soggy |
Use a kitchen scale | Accurate flour measurement |
Don't overbake the filling | Keeps it creamy, not dry |
Cool completely before cutting | Clean slices, perfect texture |
Freshly squeezed lemon juice | Best flavor, avoid bitterness |
Zest only the yellow part of the peel | No bitter taste |
Gluten Free Lemon Bars FAQs
Gluten Free Lemon Bars FAQs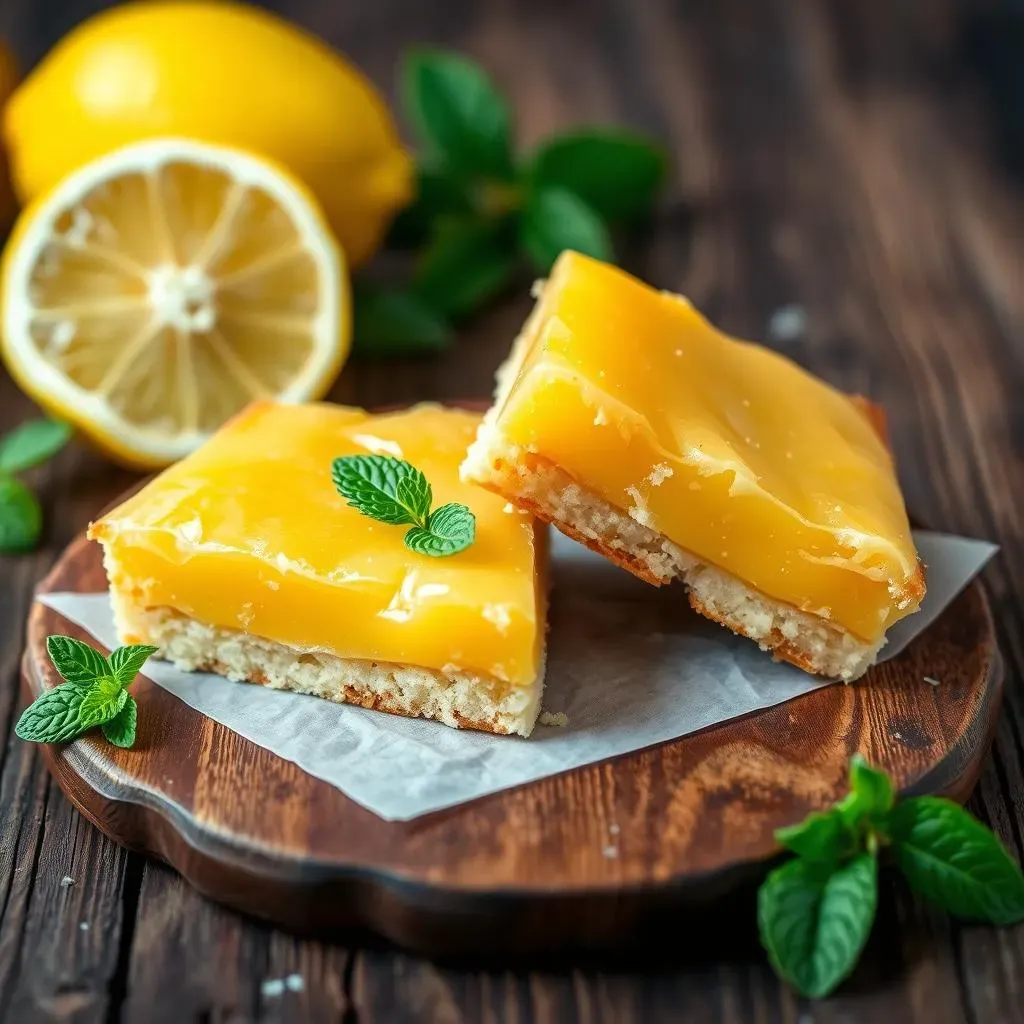
Are Lemons Gluten-Free?
Okay, let’s start with the basics, and I know this might sound like a silly question but it’s important: are lemons gluten-free? Yes! Lemons, in their natural form, are 100% gluten-free. The issue isn't the fruit itself, but sometimes it's about the stuff that might get added to them or how they are processed. So, when you're using lemons in a recipe like this, you don't need to worry about the lemon itself adding any gluten. Just make sure you’re using fresh lemons and not some pre-made lemon product that might have hidden gluten-containing ingredients. Always check the label on pre-made lemon curd or lemon juice just to be safe!
I had a friend who once bought a lemon curd from a local bakery that was supposed to be gluten-free, but it turned out to have some wheat flour in it. So always, always double check! It’s better to be safe than sorry. And this is why I always recommend making your own lemon curd, it’s super easy and you know exactly what’s in it. But for this recipe, we’re using fresh lemon juice and zest, so you’re totally in the clear.
How Do I Know When the Bars Are Done Baking?
Figuring out when lemon bars are perfectly baked can be a bit tricky, but there are a few key things to watch for. First off, the edges of the bars should be golden brown, and the filling should look set, not all liquidy. When you gently shake the pan, the center of the filling should have a very slight jiggle, like a wobbly jelly, but not a sloshing liquid. Think of a perfectly cooked creme brûlée; it's set but still has a bit of a wiggle. If the center is still very liquid, keep baking it for a few more minutes and check again. Also, if you see the top of the filling starting to crack or bubble excessively, it's a sign that you might have overbaked them. So keep an eye on it, and remember, it’s better to underbake them a tiny bit than overbake them and end up with a dry, cracked mess.
I’ve had my fair share of overbaked lemon bars, and trust me, it's not a fun experience. They end up being dry and not nearly as creamy as they should be. So, always err on the side of caution and check them frequently towards the end of the baking time. And remember, they will continue to set as they cool, so don't panic if they seem a little soft when you take them out of the oven. Cooling time is part of the process, so let them be. Patience, my friend, is key in baking and in life.
Question | Answer |
|---|---|
Are lemons gluten-free? | Yes, in their natural form. |
How do I know when the bars are done? | Edges are golden, filling is set with a slight jiggle. |
Why Are My Lemon Bars Gooey or Have Bubbles?
So, you've followed the recipe to a T, but your lemon bars are either too gooey or have weird bubbles on top. What gives? Well, a few things could be going on. If they're too gooey, it usually means they weren't baked long enough. The filling needs enough time in the oven to set properly. But sometimes, even if you bake them long enough, they might still be a bit gooey if your oven temperature is off. I recommend getting an oven thermometer to check if your oven is running too hot or too cold. I’ve had ovens that are 25 degrees off, and it can make a huge difference in baking.
And what about those pesky bubbles? Well, if you see a lot of bubbles, it's often a sign that the filling was whisked too vigorously. You want to mix it until it's smooth, but don’t go overboard and whip a bunch of air into it. Those air bubbles can cause weird textures on the surface of your bars. Also, sometimes bubbles can form if the oven is too hot. So, again, an oven thermometer is your friend here. And finally, sometimes the bubbles are just a normal part of the baking process, and they’ll settle down as the bars cool. So, don’t stress too much about a few bubbles; as long as the taste is great, that’s all that really matters.
Can I Make These Dairy-Free or Vegan?
Okay, so you're wondering if you can make this recipe dairy-free or even vegan? Let's tackle dairy first. You can absolutely swap out the butter for a dairy-free alternative, such as a vegan butter stick. I've used a few different brands and they work pretty well, just make sure it’s one that melts and behaves similarly to regular butter. I've heard some people using coconut oil, but that can add a subtle coconut flavor that might not be what you're going for in a lemon bar. So, I recommend sticking with a good quality vegan butter.
Now, for the vegan part, this is where it gets a bit tricky. The eggs in this recipe are essential for both the structure and the texture of the filling. I haven't found a reliable substitute for eggs that will give you the same results. I’ve tried using flax eggs and other egg replacers but they don't quite do the trick for these bars. So, unfortunately, this recipe is not easily adaptable to be vegan. But, if you’re just trying to avoid dairy, you’re in luck. Just swap out the butter and you’re good to go. I’m always experimenting though, so if I find a vegan alternative that works, I’ll be sure to update you!
Issue | Possible Cause |
|---|---|
Gooey bars | Underbaked, oven temp too low. |
Bubbles on top | Filling whisked too much, oven too hot. |
Dairy-free option | Use vegan butter sticks. |
Vegan option | Not easily adaptable, eggs are essential. |